This article explains how to export data from Mechanical to a text file.
Export Von Mises stress (or any standard Mechanical result)
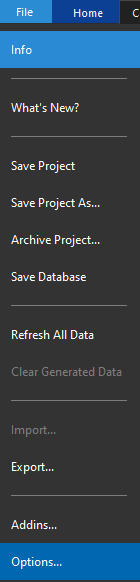
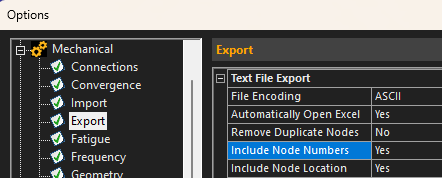
The easiest method here is to manually go to Mechanical Options and check that Export options include "Include Node Numbers" and "Include Node Location":
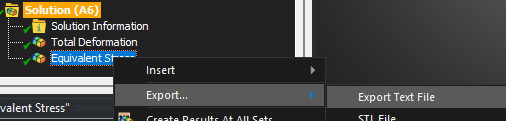
Then, insert an equivalent stress result, evaluate it, and export to text file:
The code to automate this action (inserting result, evaluate, export) is as follows:
import os
analysis = Model.Analyses[0] # adapt to analysis number
solution = analysis.Solution
seqv = solution.AddEquivalentStress()
seqv.EvaluateAllResults()
solver_directory = analysis.WorkingDir
export_file_path = os.path.join(solver_directory, seqv.Name + '.txt')
seqv.ExportToTextFile(export_file_path)
This method uses the Mechanical Automation API
Export more complex data
Depending on the data you'd like to retrieve, several methods can be explored. The Mechanical Automation API can be used, but depending on the case, it might be easier to take another approach, by using DPF (Data Processing Framework). Please refer to the Scripting in Mechanical guide, where several examples are exposed. This post can also be of interest.
The below example shows using the Mechanical Automation API to export Von Mises stress for the last time step, on the entire model, as well as the material name per node:
import os
import wbjn
analysis = Model.Analyses[0] # adapt to analysis number
solution = analysis.Solution

# Get Von Mises Stress
seqv = solution.AddEquivalentStress()
seqv.EvaluateAllResults()
result_table = seqv.PlotData
result_table.ShowHiddenColumns = True # show hidden columns to get body ID
result_list = []

for i in range(len(result_table['Node'])):
    local_result = []
    local_result.append(result_table['Node'][i])
    local_result.append(result_table['Body'][i])
    local_result.append(analysis.GeoData.GeoEntityById(result_table['Body'][i]).Material.DisplayName)
    local_result.append(result_table['Values'][i])
    result_list.append(local_result)


# Export
userfilesdir = wbjn.ExecuteCommand(ExtAPI,"""returnValue(GetUserFilesDirectory())""")
output_file = os.path.join(userfilesdir,"output.txt")
with open(output_file, "w") as f:
    for row in result_list:
        # Convert all elements to string and join with commas
        line = ",".join(str(item) for item in row)
        f.write(line + "\n")
print("Data written to", output_file)
Export BCs defined on the model
There are two possible methods here: write Python code to open and parse the MAPDL input file (ds.dat) ; or loop through the boundary conditions defined in Mechanical. The example below shows an example of the second approach. The exported data shows the boundary name and the node numbers scoped in that boundary condition.
import os
import wbjn
analysis = Model.Analyses[0] # adapt to analysis number
meshdata = analysis.MeshData
nb_children = analysis.Children.Count
boundary_conditions = []
for bc_i in list(range(1, nb_children-1)): # filter out first and last child of analysis as they are the analysis settings and the solution
    bc = analysis.Children[bc_i]
    bc_info = []
    temp_list_nodes = []
    print (bc.Name)
    for item in list(bc.Location):
        scoped_nodes = meshdata.MeshRegionById(item).NodeIds
        temp_list_nodes.append(scoped_nodes)
    list_nodes = [item for sublist in temp_list_nodes for item in sublist] # flatten list
    bc_info = [bc.Name , list_nodes]
    boundary_conditions.append(bc_info)

# Export
userfilesdir = wbjn.ExecuteCommand(ExtAPI,"""returnValue(GetUserFilesDirectory())""")
output_file = os.path.join(userfilesdir,"boundary_conditions_output.txt")
with open(output_file, "w") as f:
    for row in boundary_conditions:
        # Convert all elements to string and join with commas
        line = ",".join(str(item) for item in row)
        f.write(line + "\n")
print("Data written to", output_file)